Advanced Configuration
This guide covers how to connect directly to your Raspberry Pi for development and how to manage the background service that runs the AI client.
Connecting via Mobile Hotspot
Step 1 — Create a Hotspot
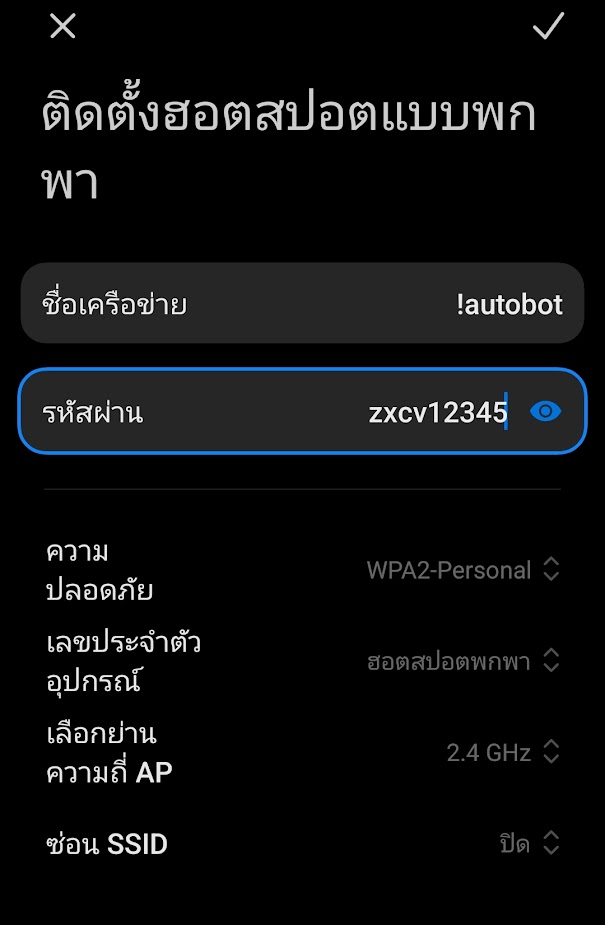
Create a mobile hotspot on your device with the following credentials. The Raspberry Pi is pre-configured to connect to this network automatically.
| Setting | Value |
|---|---|
| SSID | !autobot |
| Password | zxcv12345 |
Step 2 — Verify the Connection
- Connect your computer to the
!autobotWiFi network. - Power on the Raspberry Pi.
- Observe the WiFi status LED on the Pi to confirm it has connected successfully.
Step 3 — Connect via SSH
Once both devices are on the same network, open a terminal and connect:
ssh autobot@autobot-pi
When prompted, enter the password for the autobot user (press the space bar once).
Step 4 — Grant Serial Port Access
To allow the AI client to communicate with the hardware via serial port, add the user to the dialout group:
sudo usermod -a -G dialout $USER
Note: You must log out and log back in (or reboot the Pi) for this permission to take effect.
Step 5 — Locate the Client Script
The main Python script is located at:
~/Autobot/pi-client.py
Full path: /home/autobot/Autobot/pi-client.py
Service Management (systemd)
The AI client runs as a systemd background service called pi-client.service. All commands below should be run over SSH on the Raspberry Pi.
Create or Edit the Service File
To create a new service unit file or modify the existing one:
sudo nano /etc/systemd/system/pi-client.service
Tip: In
nano, pressCtrl + Oto save the file, thenCtrl + Xto exit.
Register and Enable the Service
After creating or modifying the service file, reload systemd and enable the service to start on boot:
# Reload systemd to recognize config changes
sudo systemctl daemon-reload

# Enable auto-start on boot
sudo systemctl enable pi-client.service

# Start the service immediately
sudo systemctl start pi-client.service
Check Service Status
sudo systemctl status pi-client.service
| Status | Meaning |
|---|---|
| ✅ Active (running) | The service is running normally |
| ❌ Failed / Inactive | The service has stopped or crashed — check the logs below for details |
View Logs
Use journalctl to view real-time output from the service (including print() statements and Python errors):
journalctl -u pi-client.service -n 50 -f
Press Ctrl + C to exit the live log view.
Restart After Code Changes
If you modify pi-client.py, you must restart the service for changes to take effect:
sudo systemctl restart pi-client.service
File Transfer (SCP)
Use SCP (Secure Copy Protocol) to transfer files from your computer to the Raspberry Pi. Run these commands from your local machine, not from the Pi.
Syntax
scp <local-file> autobot@autobot-pi:<remote-path>
Example
Transfer a file called new_script.py from your Downloads folder to the Pi:
Windows:
scp C:\Users\YourName\Downloads\new_script.py autobot@autobot-pi:~/Autobot/
macOS / Linux:
scp ~/Downloads/new_script.py autobot@autobot-pi:~/Autobot/
You will be prompted for the autobot user's password. The transfer progress will be displayed in the terminal.
Related Links
- AutOBot Library (GitHub)
- AutOBot (GitHub)
- AutOBot-Web (GitHub)
- Autobot Raspberry Pi Image (Archive.org)
- 🎬 AutOBot YouTube Channel